Growing e.coli on my own

4 Comments

Anthony is teaching lab this afternoon and asked me to start a batch of e.coli… all by myself. At first I was thinking, “Sure, no big deal. I’ve done this several times with you.” Then I got to the lab and got all nervous. Silly me. 🙂

Here is the procedure I followed:

  1. put on gloves – very important not to contaminate myself.
  2. get supplies:
    • 10mL tube and pipette
    • inoculating loop, Green 10 x 1µL
    • autoclaved test tube
    • LB broth
    • agar plate with e.coli – LB Day 2 batch
  3. Remove cover from LB broth and pipette 10mL of broth into test tube.
  4. Re-cover test tube and broth.
  5. Dispose of pipette tube in bio-hazard bin.
  6. Remove parafilm from agar plate.
  7. Using inoculating loop, get a single colony of e.coli on loop.
  8. Put loop in test tube and swirl for a few seconds.
  9. Dispose of loop in bio-hazard bin.
  10. Recover test tube.
  11. Place test tube in incubator at 37 C.
  12. Re-cover agar plate and seal with new parafilm.
  13. Place agar plate and LB broth back in refrigerator.

Everything went smoothly. I didn’t spill or contaminate anything (this is so silly, I feel like the first time I got to ride my bike without my parents watching). We should have some new e.coli tomorrow to use for this week’s experiments.

See you all then!

Yeast, E.coli day 2

3 Comments

After 12+ hours in the incubators we have growth… well almost. Neither one of the yeast agar plates grew anything. However, both the LB broth and LB agar plate grew e.coli, and the YPD broth grew yeast.

So today we did a few things:

  • We set up two new YPD agar plates using starter culture from the YPD broth that we grew last night. One agar plate is in the 24° C incubator and the other is at room temperature.
  • We decided to grow some more e.coli colonies on an additional LB agar plate using starter culture from the LB broth that we grew last night. It is now in the 37º C incubator.
  • We took spectroscopic readings of our samples using the Thermo Nanodrop 2000C. We used 2mL of the YPD and LB broth and then did the same with 2mL of each starter culture.

Baseline Spectroscopy of Yeast and E.Coli

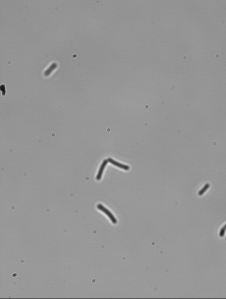
Yeast Picture

E.Coli Picture

REU Tour of The National Museum of Nuclear Science & History and CINT

Leave a comment

Linda Bugge, our REU administrator coordinated a wonderful day for all of the REUs yesterday.

We all met at CHTM at 9:30 to carpool to our first destination, The National Museum of Nuclear Science & History. We arrived just in time to watch Modern Marvels, The Manhattan Project. I hadn’t seen the show before today, and was pretty impressed with the what I learned. A few key items that I recall (disclaimer: I am not making any kind of statement here, just recalling facts that I learned today):

  • The project was started in 1939 and cost over two billion dollars (over 30 billion in today’s dollars).
  • There were several, very large, sites built in a very short period of time to facilitate the building of the atomic bombs.The three main sites were Oak Ridge, Tennessee; Los Alamos, New Mexico; and Hanford, Washington. This map shows all the sites.
  • The three methods for obtaining Uranium 235 were all extremely difficult, time consuming, and labor intensive.
  • Most of the work done to obtain Uranium 235 was done in Oak Ridge.
  • Oak Ridge’s energy consumption was 10% of the total US energy consumption during it’s operation.
  • Since Uranium 235 was so difficult to obtain, there was only one bomb (Little Boy) made from this material… and no test bomb was made prior. The first Uranium 235 bomb to ever explode was the bomb dropped on Hiroshima.
  • Plutonium was easier to produce, and was made by a plutonium production reactor at the Hanford site.
  • Because they had plenty of plutonium, they exploded a test bomb on July 16, 1945. Fat Man was dropped on Nagasaki on August 9, 1945.
  • Since that time, war related deaths (U.S.) have declined exponentially.

After that we were free to view the exhibits of the museum at our leisure. At 12 we all got back together and went to Chili’s for a wonderful lunch. Next we headed over to CINT (The Center for Integrated Nanotechnologies) for a tour of the facilities and a few informative presentations by some of the staff.
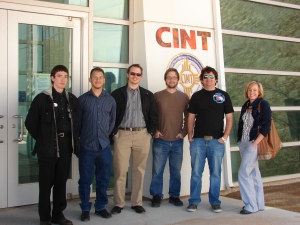
2011/12 REUs outside of CINT

George Bachand was very kind, and took all of us around the facility and explained things as we were walking. The facility is quite large and there is a bunch of research being done. He was very informative, but to be honest, I understood only very little about what we initially saw. We then broke into two separate groups. One group went to tour microprocessors. I went with Wally Paxton’s group to take a look at his Soft and Biological Nanomaterials work.

Wally showed us his lab where he is “developing new strategies for efficient integration of functional molecules, including transmembrane transport proteins, and the means to characterize the action of these exotic molecules at interfaces.” Then we went into an adjoining lab and met another scientist, Nathan who showed us some video he had taken of microtubules.

Nathan had a lot of information for us about his current work and possible future applications for his research. If I understood him correctly, this could possibly, one day in the future, include repairing nerve damage and brain trauma. This was fascinating for me. It seemed similar to the work that Nadia Fernandez-Oropeza is working on. (Nadia is also one of Dr. Koch’s grad students. Anthony and I share a lab with her at CHTM.)

Next we all joined back up to hear from Mark Stevens, who told us about his work as a theorist. Finally Neal Shinn, the Co-Director of CINT, told us about the proposal submission process and life cycle. Basically it works like this:

Anyone who needs help with their research can submit a proposal for use of CINT’s facilities and/or scientists. There are two ways to submit proposals, during their twice a year “call for proposals,” which would provide access to CINT for up to 18 months, or as a “rapid access” submission for time sensitive or short term projects. The proposal should be no more than two pages. About 80% of the proposals submitted get approved. Once approved the only requirement is that the results of your research be published.

After that our day was over. I had a really good time and learned a lot. Many thanks to Linda for all of her efforts putting this day together for all of us.

Creation of E.Coli

4 Comments

Today we are making e.coli for our DDW experiments. The first step is to make the e.coli medium. We made up a small batch of LB Broth, using the instructions from the Sigma-Aldrich website.  We only made 100mL of LB Broth, instead of 1L, as follows:

  1. Mixed 2 g of LB Broth powder with 100mL of distilled water.
  2. Autoclave for 15 minutes at 121°C.

After the mixture cooled, we measured 10mL into two test tubes and mixed in a minute amount of e.coli.

Next we placed the test tubes in the New Brunswick Scientific Innova 4300 Incubator Shaker at 37° C. Our shaker’s thermostat is about .3°C – .4°C high , so we stuck a thermometer probe in the shaker to get an accurate temperature measurement.

We set the incubator shaker at 70 RPM for a few hours. I have to leave for class, and Anthony wasn’t sure if we needed to leave it longer or maybe even overnight. Please check his blog for the final details.

E.coli meets DDW – step 1: Autoclave

3 Comments

We are preparing for our upcoming experiments testing the growth rate of e.coli in different water types. When working with e.coli all the equipment must be sterile. Here at KochLab we use a Tuttnauer 3545M autoclave to sterilize our equipment and mediums.

Autoclaves use high pressure steam to sterilize equipment, read more at Wikipedia. Here is our process for solid items (liquid items follow the same procedure with some setting changes as noted in parentheses):

  1. Add water to the autoclave reservoir through the opening on the top of the machine.
  2. Take out the tray and put all the items to sterilize on the tray. Place a foil seal over the top of any open container. Place a piece of autoclave tape on each item. When the white lines on the tape turn black, the item is autoclaved properly.
  3. Turn on the autoclave and turn the bottom dial to Fill Water. When the water has filled to the front lip, turn the Fill Water dial off.
  4. Place the tray of items in the autoclave, close and lock the door. Tighten the lid… REALLY TIGHT! The autoclave is cooking things under heat and pressure.
  5. Set the temperature to 273° F (250°F) and the timer to 45 min (60 min). The orange Heat light should be on.
  6. After the timer sounds, wait about half an hour. Check the autoclave and make sure the white pressure arrow is at zero.
  7. If the white pressure arrow is at zero, set the dial to 0 (zero, turn counter-clockwise) and loosen the door so that it is open about 1 inch.
  8. Set the dial to Dry and the timer to 30 min. The orange Dry light should be on.
  9. After the timer sounds, turn the knob to 0, open the door, and, using heat resistent mits, remove the sterilized items.

REU January Presentation

1 Comment

Today was presentation day at CHTM. All the REU students (me included) gave a 20 minute presentation about what we have been doing for our research. I don’t know why, but I get extremely nervous for these presentations. The strange thing is I have a lot of experience speaking to crowds of people. I used to teach continuing education classes, and was never even a little bit nervous. I wonder what is going on?

Anyway, all this week Dr. Koch, Anthony and I have been working on my Mind Map presentation. I wanted to do something different from the standard PowerPoint presentation. Don’t get me wrong, PowerPoint is a good tool, I just wanted to do something different. We decided a Mind Map would be a good way to show case one of the many tools/applications that we use here in Kochlab.

In addition, I handed out little cards with a qr code and a short link to a google docs spreadsheet with links to many of the tools we use for our ONS. My Mind Map also had links to most of the information that I used for my research and presentation.

After it was all over I realized that I had forgotten to show the really cool, time lapse growth images that Anthony had put together for the D2O experiments.

Next presentation I will take Dr. Koch’s suggestion and practice, out loud, the entire presentation. If I do this several times I might not get stage fright quite so bad.

I’m really grateful for the opportunities that have come my way  since I’ve been working here at CHTM and KochLab. Dr. Koch and Anthony have been absolutely great to work with. Linda Bugge has been a good friend and really helpful with all the administrative “stoof.” It is an honor to have been selected to be a part of the NSF grant. I’m meeting some really awesome and brilliant people here. I’m super lucky.

Working in R

4 Comments

Brain Dump of what I’ve learned today:

  1. R’s GUI preferences are stored in the Rconsole file. I’ve found two on my machine, one in C:\Program Files\R\R-2.14.1\etc, and a second (the one that R seems to be using for its GUI) in C:\Users\Alex\Documents. I find it strange that the one that R is pulling from is in Documents and not with the other R program files.
  2. I’ve started a document listing the commands that I learn as I’m going (probably will stop updating when my book arrives on Saturday. It’s posted on Google Docs
  3. I wanted a way to sync my MS Office documents with Google Docs, and I didn’t see anything other than to re-upload and overwrite. Found Google Cloud Connect after searching for “sync google docs.” (I also didn’t like the way Google messed with my table formatting.) Note: The Google Cloud toolbar is bulky.
  4. Getting a file off of the internet requires the package RCurl, which has the function getURL.

I spent most of the day going over, line by line Dr. Koch’s R code when he compared Anthony’s and my FTIR with Seigelstein’s. I opened the code in RStudio and used the R Console to pull up the help for each of the commands/functions. Although, on a high level I understood what the code was doing, it was helpful to get down and dirty and read the specs and learn about the arguments. I wont remember how to do stuff on my own, but I’ll know what can be done. As I’m moving along I’m taking notes in my R commands.docx document.

I’m taking a break. I think I’ll watch some youtube videos tonight.

R Tutorials

2 Comments

I spent all day going through several R tutorials. My brain is a little spent. I’ve realized that I need a good reference book. I’m the geek that likes to read the dictionary. When I learn new code I like to read through the book with the basic commands first, before I start banging stuff out. I learn best when I know what’s available to use and then I can put things together.

That being said, I did go to a local brick and mortor book store to look for a reference book a few weeks ago with Anthony. The selection of books available there was disappointing. Of course there is a plethora of books available online. I”ll be ordering one in the next day or two.  I’d also like to know what all the library packages do. I’m hoping that the book I get has a good package referrence.

Part of the reason for my lack of understanding might also be that I don’t have statistics experience. So, therre were a few things in the tutorials that I didn”t understand from that angle. I”ll get it. More studying to do tomorrow.

Happy Holidays

Leave a comment

I hope everyone had a great holiday and a happy New Year.

Ft-IR, part deux

1 Comment

What an exciting morning! I’m feeling all geeked out. The new glass cuvettes that Anthony ordered came in and we were able to coordinate some time with Stephen to try the Ft-IR experiment again (see previous post).

We have been wondering if each of our types of water, DDW, D2O, and DI had a noticeably different spectroscopy. We also suspected that after opening a bottle of DDW it would eventually gain back some Deuterium and become normal H2O (which is about 150 ppm Deuterium). We were hoping that the Ft-IR could confirm this theory. Our first try was inconclusive because of the plastic cuvettes we were using.

Pretty exciting results: There is a definite spectropic difference between D2O, DDW, and DI. And the old DDW (about 3+ months) had about the same reading as the DE. Our suspicions were confirmed. We did a little happy dance and a high-five!

Anthony is uploading the results to Google Docs this very minute and will have a more detailed post. I’ve got to leave for another commitment, but I was so excited about this I wanted to share it before I had to leave.

Older Entries